
Create a Schedule in Excel From Scratch
Building a schedule in Excel can be as simple as you need it to be. You can throw together a basic grid with columns for dates, times, and tasks in a few minutes, or you can grab one of Excel’s many built-in templates for a running start. But the real magic is in its unmatched flexibility—letting you create anything from a simple daily to-do list to a complex project timeline that’s completely your own.
Why Excel Still Wins for Scheduling
With a sea of specialized scheduling apps out there, you might be wondering why so many people still fire up a simple spreadsheet. The answer comes down to two things: control and familiarity.
Dedicated apps are convenient, but they often box you into a rigid structure. Excel, on the other hand, is a blank canvas. You’re the architect. This is where Excel really shines. You aren't stuck with pre-set categories or views that don't quite fit. Instead, you can design a system that perfectly mirrors your actual workflow, whether that's for managing your own tasks, mapping out employee shifts, or tracking a project with a dozen moving parts.
Unmatched Customization and Accessibility
The level of personalization you can achieve in Excel is something standalone apps just can't touch. You get to decide the entire layout, set up your own color-coding system, and choose exactly what data you want to track. It means you can build a schedule that isn’t just functional but is also visually intuitive for you.
Plus, Excel is practically everywhere. Most of us already have it on our computers and know our way around the basics. That completely sidesteps the learning curve and subscription fees that come with adopting new software. This accessibility also means your schedule can be easily shared and understood by coworkers or family members without making them sign up for yet another new service.
The Power of Automation
Beyond just making grids, Excel’s true scheduling power comes alive with its formulas. You can automate all sorts of calculations.
- Total hours worked for payroll or client billing.
- Countdown timers to keep an eye on important deadlines.
- Task progress summaries that update in real-time.
This ability to weave calculations right into your schedule transforms it from a static document into a dynamic management tool. It's no surprise the global spreadsheet software market was valued at USD 17.75 billion and continues to grow, largely because of its critical role in tasks just like this. This just goes to show how essential spreadsheet skills still are in the business world. Find out more about the spreadsheet software market trends.
Learning how to build a schedule in Excel is more than just organizing your time. It's about developing a core data management skill that pays off in countless situations, both at work and in your personal life.
Building Your Schedule's Foundation
Alright, let's get our hands dirty and start building. Theory is great, but the real magic happens when you open a blank Excel workbook. Staring at all those empty cells can feel a bit daunting, but a strong, scalable schedule only needs a few core components to get started.
The best schedules I've ever built all began with a simple, logical structure. We'll kick things off by setting up the essential columns that will act as the backbone for your entire planner. Getting this initial setup right is a quick win that prevents a ton of headaches later on.
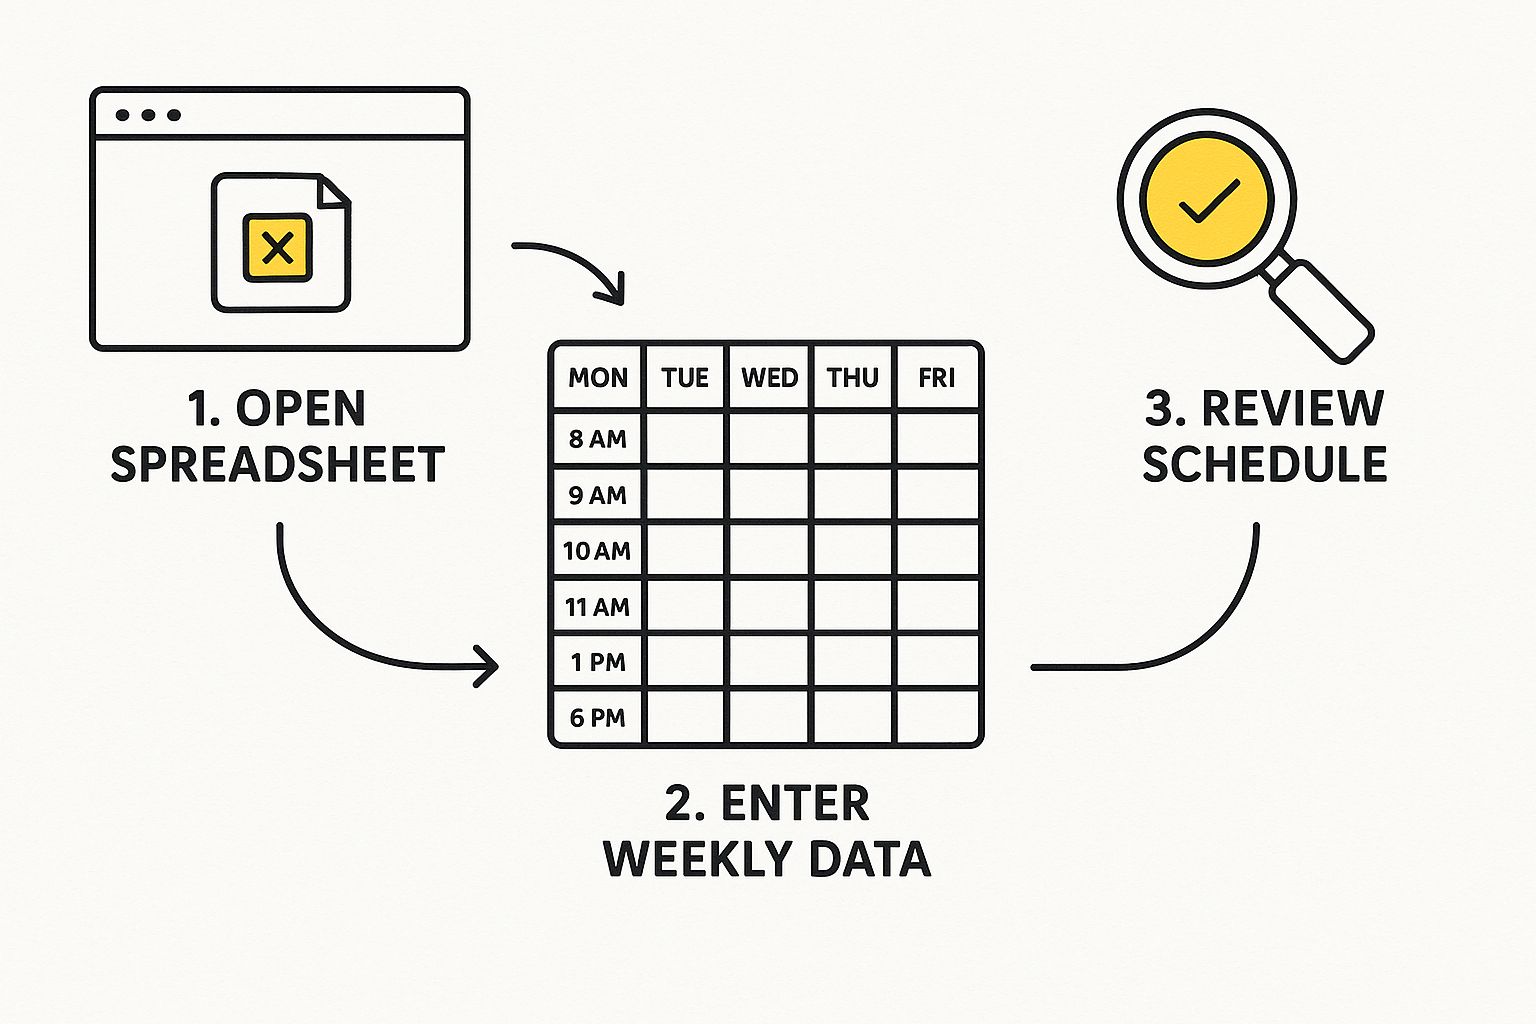
This visual is a perfect example of a clean, weekly grid—time slots on one axis, days on the other. Adopting this kind of organized layout is your first step toward a functional planner that’s actually easy to read and update.
Setting Up Your Core Columns
In your new, blank sheet, let’s label the first four columns: Date, Time, Task, and Notes. That's it. This simple layout is surprisingly versatile, working for everything from a daily to-do list to a more complex project tracker. It gives you a clear spot for what needs to happen, when it's happening, and any other details you need to jot down.
To make it instantly more readable, let's adjust the column widths. You can just double-click the line between the column headers (like between A and B) to auto-fit the text. Or, my preferred method, click and drag the boundary yourself. I always recommend making the ‘Task’ and ‘Notes’ columns wider right from the get-go.
Populating Dates and Times Instantly
Manually typing out every single date and time is a surefire way to get frustrated. This is exactly where Excel’s Fill Handle becomes your best friend. It’s that tiny green square you see in the bottom-right corner of any cell you select.
Here's how to put it to work and save yourself some serious time:
- Pop your starting date into the first cell of the 'Date' column (let's say A2).
- Do the same for your starting time in the 'Time' column (e.g., B2).
- Click the cell with the date, then hover over the Fill Handle until your cursor turns into a solid black plus sign.
- Now, just click and drag down the column. Excel is smart enough to fill in the rest of the dates for you.
- Repeat the exact same process for your time column to create all your time slots (8:00 AM, 9:00 AM, and so on).
This one simple trick automates a painfully boring data entry task, letting you get back to actually planning your schedule.
By establishing a clean structure with clear columns and auto-filled data, you create a robust foundation. This organized base makes it much easier to add advanced features like color-coding and formulas later on.
Applying Basic Formatting for Readability
A little bit of formatting makes a world of difference. To give your grid some definition, let's add borders. Highlight all the cells that make up your schedule, head to the 'Home' tab, and in the 'Font' section, click the little dropdown next to the Borders icon. Select 'All Borders.' This simple visual tweak makes the whole thing much easier to scan. The principles of creating an effective work schedule often start with these small details that boost clarity.
Finally, you need to make your headers pop. Select that top row with your titles, click the Bold button, and then use the 'Fill Color' tool (it looks like a paint bucket) to give the row a background color. This creates a clear visual separation between your column titles and the actual schedule, guiding the eye right where it needs to go.
Bringing Your Schedule to Life with Smart Formatting
Okay, you've built the basic structure of your schedule. It's functional, sure, but now it's time for the fun part: making it smart. We're moving beyond basic borders and bold text to use Excel’s tools to make your schedule tell a story at a glance. This is how you create a schedule that truly works for you, not the other way around.

The goal is to turn a static grid of data into a dynamic dashboard. You should spend less time reading your schedule and more time understanding it.
Automate Your Visuals with Conditional Formatting
If you learn only one advanced trick in Excel, make it Conditional Formatting. This feature is an absolute game-changer for schedulers. It lets you create rules that automatically change how a cell looks—its color, its font, you name it—based on what's inside it. This isn’t just about making things look nice; it’s about building an instant visual language for your schedule.
Think about it: instead of manually coloring in completed tasks, you can tell Excel, "Hey, if this cell says 'Complete,' make it green." That one simple automation saves a ton of time and, more importantly, cuts down on human error.
Let's say you're managing a small team's weekly task list. You could set up a few simple rules:
- If a task's status is "Complete," turn the entire row green.
- If a task is marked "Overdue," highlight its deadline cell in red.
- If a task is assigned to "Project Alpha," color it yellow.
Suddenly, you can see what's done, what’s on fire, and where your team is focused without reading a single word. To get started, just highlight the cells you want the rule to apply to, head to the 'Home' tab, and click 'Conditional Formatting' to see all the options.
By setting up automatic color-coding, your schedule becomes a living document. It instantly flags priorities and progress, helping you make faster, more informed decisions throughout the day.
Standardize Entries with Data Validation
Consistency is everything in a good schedule, especially if more than one person is using it. You know the pain: one person types "Done," another types "complete," and a third types "Finished." This kind of chaos breaks formulas and makes filtering a total nightmare. Data Validation is the fix.
This tool lets you lock down what kind of data can even be entered into a cell. For scheduling, its most powerful use is creating simple dropdown menus.
For your 'Status' column, you can create a dropdown list that only allows three options: Not Started, In Progress, and Complete. That’s it. Now, every entry is perfectly uniform, which keeps your data clean, sortable, and reliable. To set this up, select the column, go to the 'Data' tab, click 'Data Validation,' and choose 'List' from the 'Allow' dropdown. Then you can just type your options right into the source box.
This small step forces everyone to record information the same way, which is absolutely critical if you ever want to analyze or summarize your schedule data later on.
To make your schedule truly intuitive, it helps to understand the core tools at your disposal. Each one serves a specific purpose, from automating visual cues to ensuring data integrity.
Key Excel Formatting Tools for Schedules
| Feature | Primary Use Case | Pro Tip |
|---|---|---|
| Conditional Formatting | Automatically color-coding tasks based on status, priority, or deadline. | Use the "Format Painter" to quickly copy your conditional formatting rules to other sections of your schedule without setting them up from scratch. |
| Data Validation | Creating dropdown lists to standardize entries (e.g., "Complete," "In Progress"). | In the Data Validation setup, you can add an "Input Message" that pops up when a user clicks the cell, guiding them on what to enter. |
| Tables | Organizing data with built-in sorting, filtering, and styling options. | When you convert your range to a Table (Ctrl+T), any new rows you add will automatically inherit all formatting and formulas. It's a huge time-saver. |
| Freeze Panes | Keeping header rows and columns visible as you scroll through a large schedule. | Place your cursor just below the header row and to the right of the first column before clicking "Freeze Panes" to lock both at the same time. |
Mastering these features is the difference between a schedule that's just a grid of text and one that actively helps you manage your time and projects. Take a few minutes to play with each one—you'll quickly see how powerful they can be.
Automating Your Schedule with Formulas
Once you have a solid structure, it's time to make your schedule truly work for you. The real magic of building a schedule in Excel isn't just in the layout—it's in the formulas. They transform your static grid into a dynamic tool that calculates, updates, and gives you insights with minimal manual input. This is the difference between simply listing tasks and actively managing them.
Let's start with a classic: the SUM function. It's straightforward but incredibly useful. If you have a column dedicated to "Hours Worked," a simple formula like =SUM(C2:C10) at the bottom will instantly give you the total. It's a must-have for tracking time, managing project billing, or handling payroll.
For a deeper dive into this, our complete guide on understanding work hours calculation covers some more advanced techniques.
Moving Beyond Basic Math
Simple addition is just the starting point. The real power comes from logical and date-based functions that can automate decision-making right inside your schedule. These formulas take the mental load off of tracking progress and deadlines.
Consider adding these powerful functions to your toolkit:
IFFunction: This is an absolute workhorse for automation. You can create a formula like=IF(B2="Complete","Done","Pending")to automatically show a task's status. Change the value in cell B2, and the message updates on its own.COUNTIFFunction: Ever wonder how many tasks are assigned to a specific person? A quick formula like=COUNTIF(A2:A20,"John Doe")gives you an instant tally without having to count by hand.TODAY()Function: This simple but brilliant function always displays the current date and updates every time you open the workbook. It's perfect for creating dynamic "days until deadline" counters.
Automating calculations with formulas isn't just about saving a few minutes. It ensures accuracy by removing manual entry errors and gives you real-time information to stay on top of your schedule.
Managing Timelines with Date Functions
For any schedule stretching over weeks or months, handling dates is critical. Excel has a set of specialized functions built just for timelines, and they can even account for the standard work week. No more manually skipping over weekends.
The NETWORKDAYS function is a great example. It calculates the number of working days between two dates, automatically excluding Saturdays and Sundays. For instance, =NETWORKDAYS(A2, B2) will tell you exactly how many workdays you have for a task with a start date in A2 and an end date in B2.
This level of automation is a fundamental step in modern planning. It’s no surprise that the market for advanced planning and scheduling software is exploding, valued at USD 1.33 billion and projected to keep growing. Mastering scheduling in a tool like Excel often serves as a gateway to adopting more sophisticated solutions down the line.
The principles behind this kind of automation can be applied elsewhere, too. For example, you can use similar logic to build a smart reconciliation on Excel with formulas and streamline other financial tasks.
Using Excel Templates for a Quick Start
Why build a schedule from scratch when you don’t have to? If you need a schedule now, Excel's built-in template library is the fastest way to get it done. This approach saves a ton of time and effort, giving you professionally designed layouts you can tweak in minutes.
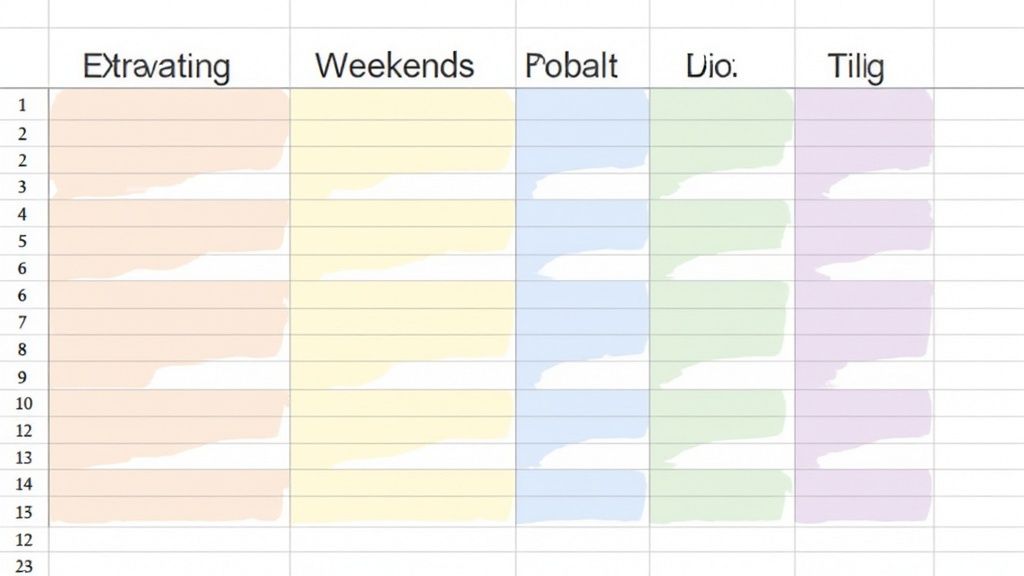
Think about it: instead of spending time setting up columns, borders, and formulas, you get a solid foundation to build on. This is perfect for anyone who needs a functional schedule immediately or just wants to peek under the hood of a pro design to learn a few formatting tricks.
Finding and Customizing the Right Template
Getting to these templates is easy. Just open Excel and, instead of clicking "Blank workbook," type "schedule" into the search bar at the top. You’ll immediately see a bunch of options designed for specific purposes.
Some of the most useful ones I've seen include:
- Daily Work Schedule: Perfect for time-blocking your workday with spots for meetings, deep work, and breaks.
- Weekly Chore Schedule: A great visual tool for divvying up household tasks among family members.
- Project Timeline: Ideal for mapping out project milestones, dependencies, and deadlines over several weeks or months.
Once you find one you like, the real magic is in the customization. Remember, a template is just a starting point. Feel free to add new columns, change the color scheme to something you prefer, or adjust the formulas to fit how you work. You can even grab a specialized time blocking schedule template online to kickstart your routine.
Think of an Excel template as a pre-built framework. Your job is to make it your own by plugging in your data and tweaking the design until it perfectly matches what you need to organize.
Lots of people get their start with a simple Excel schedule before graduating to more powerful tools. It’s no surprise that the appointment scheduling software market—a space where many users migrate from Excel—is projected to hit USD 891 million by 2031. This just goes to show how essential Excel is as a foundational scheduling tool across all sorts of industries.
For managers, these basic principles are a great stepping stone. When you're ready to take things to the next level, our guide on how to boost productivity with top employee scheduling software shows how to apply what you've learned to more advanced systems. Getting comfortable with templates is the first step toward building a truly organized workflow.
Common Excel Scheduling Questions Answered
Even with the best templates and a solid plan, you're bound to run into a few snags when building a schedule in Excel. That's just part of the process. Knowing the answers to common problems ahead of time, though, can save you a ton of frustration.
Think of this section as your cheat sheet for those little issues that can completely derail your workflow. From making your schedule feel more like a traditional calendar to sharing it with your team, the solutions are often simpler than you think.
How Can I Create a Recurring Event in My Excel Schedule?
While Excel doesn't have a built-in "recurring event" button like Outlook or Google Calendar, you can absolutely mimic that function. The quickest way is with the Fill Handle. Just enter your first event, then click and drag that little square at the bottom-right corner of the cell to copy it down. Easy.
But what about more complex patterns, like a meeting that happens every two weeks? A simple formula is your best friend here. If your first event date is in cell A2, you can pop =A2+14 into cell A3. This calculates the date exactly two weeks later. Drag that formula down, and Excel will keep the pattern going for you.
Pro Tip: Make those recurring tasks impossible to miss with Conditional Formatting. You can set up a rule that scans your sheet for a specific phrase (like "Team Meeting") and automatically applies a unique color. It's a great way to make key events stand out instantly.
What Is the Best Way to Print My Excel Schedule?
Printing a sprawling Excel schedule can feel like trying to fold a map—it rarely ends well on the first try. A few settings make all the difference. First, highlight the exact range of cells you want on the printed page. Then, head to the 'Page Layout' tab and click 'Print Area' > 'Set Print Area.' This tells Excel to ignore all the other clutter on your sheet.
Next, jump over to the 'View' tab and click 'Page Break Preview.' This view shows you exactly how your schedule will be split across pages. You can even drag the blue page-break lines around to get the layout just right. If you really need to cram it all onto one page, the 'Scale to Fit' options in the Page Layout tab will be your savior.
Can I Share My Excel Schedule for Collaboration?
Absolutely. If you want your team to jump in and make edits in real-time, the best way is to save your workbook to OneDrive and open it using Excel for the web. This creates a collaborative experience much like Google Sheets, where everyone can work in the file at the same time and see changes as they happen.
Need to send a static, unchangeable copy? Saving it as a PDF is your safest bet. For something in between, you can always protect the workbook or specific sheets with a password. You’ll find this option under 'File' > 'Info' > 'Protect Workbook.'
How Do I Make My Excel Schedule Look More Like a Calendar?
To get that classic monthly calendar grid, you'll need to rethink your sheet's structure. Start by setting up seven columns, one for each day of the week (Sunday to Saturday). In the very first cell of your grid, type in the first day of the month you want to show.
From there, you can use simple formulas to fill in the rest of the dates. To keep it looking clean, a great trick is to use Conditional Formatting to automatically gray out any dates that fall outside the current month. If you're short on time, just go to File > New and search for "Calendar." Excel has dozens of pre-formatted calendar templates ready to go.
At DeskCove, we understand that effective scheduling is the foundation of productivity. Our tool helps remote teams track time and monitor progress, turning your well-planned schedules into measurable results. Learn more about how DeskCove can simplify your team management.
