How to Make a Timesheet in Excel From Scratch

Building a timesheet in Excel all starts with the basics: setting up columns for date, start time, end time, and breaks. From there, you just need to get the cell formatting right and plug in a simple formula like =(EndTime - StartTime) * 24 to turn Excel’s time values into decimal hours. Nailing this foundation is the key to creating a reliable, reusable template that tracks work hours perfectly every time.
Building Your First Timesheet in Excel
Before you can dive into fancy formulas and automation, you need a solid foundation. Think of this initial setup like pouring the concrete for a house—if it's not done right, everything you build on top of it is going to have problems. We'll start with a completely blank spreadsheet and turn it into a clean, functional timesheet ready for action.
This first step is arguably the most important one. Getting the structure and formatting right from the get-go saves you from a world of frustrating calculation errors down the road. A well-organized sheet is also just plain easier for anyone to use, whether it’s just for you or your whole team.
Laying Out the Essential Columns
First things first, let's build the basic structure. Open a new Excel workbook and, in the first row, create headers for the essential bits of information you need to capture. These are the non-negotiables for any timesheet that’s actually useful.
To make things easy, here’s a quick rundown of the core components every effective timesheet needs. This table breaks down what to name your columns and why they matter.
Core Components of an Effective Excel Timesheet
| Column Name | Purpose | Recommended Format |
|---|---|---|
| Date | Records the specific day work was performed. | MM/DD/YYYY or Short Date |
| Employee Name | Identifies the person whose hours are being tracked. | General or Text |
| Start Time | Captures the exact time the work shift began. | Time (e.g., 9:00 AM) |
| End Time | Captures the exact time the work shift concluded. | Time (e.g., 5:30 PM) |
| Unpaid Break | Manually enter break duration in decimal hours. | Number (e.g., 0.5 for 30 min) |
| Total Hours | Calculates the total paid work hours for the day. | Number (2 decimal places) |
This simple layout provides a clear, logical flow for entering time, which makes the whole process smoother and less prone to mistakes. Feel free to add other columns like "Project Name" or "Task Description" if you need that level of detail, but these six columns form the backbone of a solid timesheet.
The Importance of Correct Cell Formatting
Here’s a pro-tip that will save you countless headaches: Excel treats time as a fraction of a 24-hour day. For instance, 12:00 PM is stored internally as the number 0.5 because it's exactly halfway through the day. If you don't format your cells correctly, your formulas will spit out bizarre, incorrect results for total hours.
To avoid this mess, you have to explicitly tell Excel how to handle the data in your time-related columns.
- Highlight your "Start Time" and "End Time" columns.
- Right-click and choose Format Cells.
- Under the "Number" tab, find the Time category.
- Pick a format that’s easy to read, like 1:30 PM.
- Now, do the same for the "Total Hours" column, but with a slight change.
- Go back to Format Cells, but this time, select the Number category.
- Set the decimal places to 2. This makes sure your final calculated hours show up as a normal decimal (like 8.50) instead of a time format.
Getting the cell formatting right is the secret to accurate calculations. By setting time columns to a "Time" format and the total hours column to a "Number" format, you ensure Excel performs the math exactly as you intend.
Microsoft Excel remains a go-to for timesheets because it’s everywhere and it’s powerful. With Microsoft 365 holding nearly 30% of the global office productivity suite market share as of early 2024, millions of businesses already have this tool ready to go. Its flexibility is what makes it so great for tracking employee hours.
For freelancers and small businesses just getting started, creating a basic template is a fantastic first step. You can find more ideas by exploring different types of a time tracking spreadsheet. This initial setup paves the way for the more powerful formulas and features we'll get into next.
Automating Calculations with Essential Formulas
Alright, with your columns set up and the formatting locked in, it’s time for the magic. This is where we make Excel do all the tedious math for us, turning a simple grid of numbers into a smart, automated timesheet.
Without formulas, you’ve basically just built a digital logbook. By plugging in a few key functions, you give it the power to calculate total hours, subtract breaks, and even flag overtime without you lifting a finger. Not only is this way faster, but it also dramatically cuts down on human error, making sure your payroll is spot-on every time.
This infographic really nails the three core stages of building a solid timesheet.
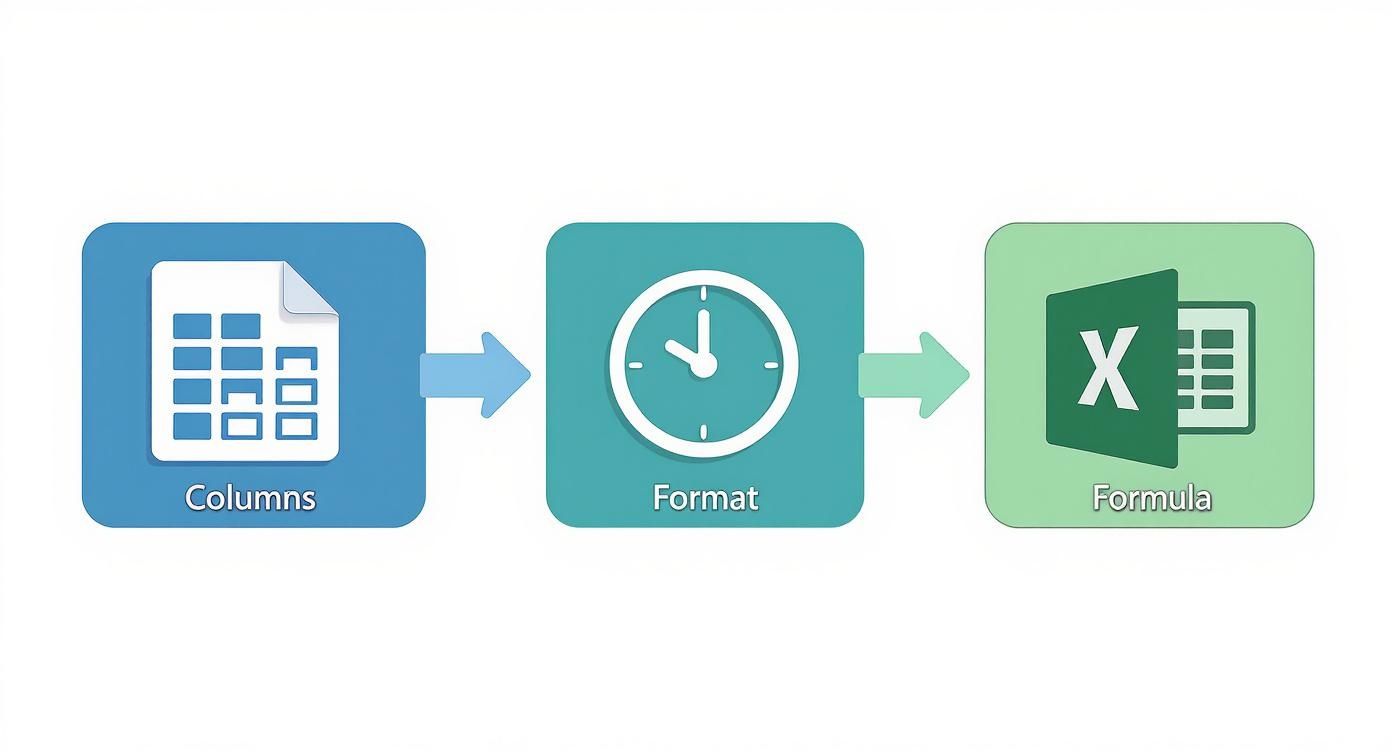
As you can see, it all comes down to setting up the structure, getting the formatting right, and then letting formulas do the heavy lifting.
Calculating Daily Hours Worked
First thing's first: let's figure out the total hours worked each day. This is the bedrock of the entire timesheet. Let's assume your "Start Time" is in column C, "End Time" is in D, "Unpaid Break" is in E, and the "Total Hours" will go in column F.
Pop into cell F2 and type this formula:
=(D2-C2)*24-E2
So, what’s happening here?
D2-C2: This is simple subtraction—end time minus start time. Excel sees this as a fraction of a 24-hour day.*24: This is the crucial step. It converts that fraction into a decimal number, which is exactly what we need for payroll calculations.-E2: Finally, this subtracts the break time. Remember, we entered this as a decimal, like 0.5 for 30 minutes.
Once you've entered the formula in the first row, just grab the little square in the bottom-right corner of the cell and drag it down. Excel will automatically apply the formula to every row below it. No retyping needed.
Summing Up Weekly Totals
Now that you have the daily totals, you need a grand total for the week. This is where the classic SUM() function comes in handy. It’s one of the simplest and most powerful tools in your Excel toolkit.
Find an empty cell at the bottom of your "Total Hours" column (column F, in our case). You can label the cell next to it "Weekly Total" to keep things clear. In the cell where you want the total, type:
=SUM(F2:F8)
This formula simply adds up all the numbers in the range from F2 down to F8. If your week has more or fewer days, just adjust the range inside the parentheses to match. Easy.
A quick tip: Consistency is your best friend for an error-free timesheet. Make sure all times are entered in the same format (like "9:00 AM") and all breaks are in decimal hours. This keeps your formulas happy and prevents weird errors.
Once you master timesheet calculations, streamlining data analysis is a great next step. Learning how to automate Excel reports can help build even more efficiency and trust in your data.
Automatically Calculating Overtime Hours
Trying to separate regular hours from overtime by hand is a recipe for headaches and mistakes. We can teach Excel to handle it automatically with a logical IF() statement. This formula is brilliant—it checks if a condition is true and then does one thing if it is, and something else if it isn't.
Let's say your company policy is overtime for anything over a 40-hour week. We already have our weekly total calculated (let's say it's in cell F9).
Now, create two new spots for "Regular Hours" and "Overtime Hours."
-
For Regular Hours: In the corresponding cell, use this formula:
=IF(F9>40, 40, F9)
Here's the logic: The formula checks if the total hours inF9are greater than 40. If they are, it just puts 40 in the cell. If not, it displays the actual total fromF9. -
For Overtime Hours: In its cell, use this formula:
=IF(F9>40, F9-40, 0)
This one also checks if the total inF9is over 40. If it is, it subtracts 40 from the total, showing you only the overtime hours. If the total is 40 or less, it just shows 0.
These two little formulas create a foolproof system for splitting regular and overtime pay, which is a lifesaver for payroll. Getting comfortable with time math in Excel can take a minute, especially converting time to decimals. For a deeper dive, check out our guide on the ultimate time conversion hack.
Improving Timesheet Accuracy and Usability
Once you've got all the right formulas plugged in, the next job is to make your timesheet bulletproof. A truly great timesheet isn't just about getting the math right; it's about stopping errors before they happen and making the whole thing incredibly easy for anyone to use. Let's be honest, a tool is only useful if people can use it correctly without needing constant hand-holding.
This is where we bring in a few of Excel’s own features to boost both data integrity and the user experience. With just a couple of tweaks, you can guide people to enter data the right way, visually flag important information, and protect all your hard work from being accidentally deleted. These little touches are what turn a basic spreadsheet into a professional, reliable tool.
Guiding Input with Data Validation
One of the most common ways any spreadsheet gets messy is through inconsistent data entry. One person might type "Project Alpha," while someone else enters "Project A," and a third makes a typo like "Porject Alpha." These little differences will wreck any attempt to filter, sort, or summarize your data down the line.
The fix for this is Data Validation, an Excel feature that lets you control exactly what can be entered into a cell. The most practical way to use it is by creating a dropdown list.
Here’s how you can set one up for a "Project" or "Task" column:
- Create Your List Source: On a separate tab (or just a hidden area on the same sheet), type out your official list of projects or tasks. Put each one in its own cell, going down a single column (e.g., Project Alpha, Project Beta, Client Meeting).
- Select the Target Cells: Head back to your main timesheet and highlight all the cells in the column where you want the dropdown to appear.
- Apply Data Validation: Go to the Data tab on the ribbon and click Data Validation.
- Configure the Settings: In the dialog box that pops up, look for the "Settings" tab. Change the "Allow" dropdown menu to List.
- Link to Your Source: In the "Source" box, click the little icon, then navigate over to the list you made in the first step. Select all the project/task names you typed out.
- Click OK.
That's it. Now, whenever someone clicks a cell in that column, a little arrow will show up, giving them a pre-approved list to choose from. This simple change completely gets rid of typos and makes sure everyone is using the exact same terms.
Visually Highlighting Key Information
Staring at a wall of numbers can be draining. Conditional Formatting is your best friend here. It automatically changes a cell's appearance—like its background color or font—based on the numbers inside it. It’s a brilliant way to draw the eye to what actually matters.
For example, maybe you want to instantly see any days where overtime was logged or an entry seems unusually high.
Here are a couple of practical ways to use it:
- Highlighting Overtime: Select your "Total Hours" column. Go to Home > Conditional Formatting > Highlight Cells Rules > Greater Than…. In the box, just type in 8 (assuming an 8-hour workday) and pick a format, like a light red fill. Now, any daily total over eight hours will pop right off the screen.
- Flagging Missing Entries: Need to spot empty cells where time should have been logged? Select your time entry columns, then head to Conditional Formatting > New Rule > Format only cells that contain. Set the rule to format cells with "Blanks" and choose a bright color like yellow.
These visual cues make reviewing a timesheet a hundred times faster. Instead of scanning line by line, your eyes are immediately drawn to the entries that might need a second look.
Protecting your formulas is a non-negotiable step for long-term usability. It prevents the all-too-common scenario where someone accidentally types over a complex formula, breaking the entire sheet without realizing it.
Protecting Formulas from Accidental Edits
The final touch for a truly robust and user-friendly timesheet is protecting your formulas. After all the effort you've put into automating the calculations, the last thing you want is for someone to accidentally type over them.
Excel lets you lock specific cells while leaving others completely open for data entry—perfect for safeguarding your hard work.
The process is a two-step dance:
- Unlock Data Entry Cells: First things first, you need to unlock the cells where people should be typing. By default, every cell in Excel is set to "Locked." Select all the columns meant for data entry (like Date, Start Time, End Time, Task, etc.), then right-click, choose Format Cells, and go to the Protection tab. Uncheck the Locked box.
- Protect the Sheet: With the right cells unlocked, now you can protect everything else. Go to the Review tab and click Protect Sheet. You can add a password here (which is always a good idea) and confirm the settings.
Once that’s done, anyone can fill in their time in the designated spots. But if they try to click on a cell with one of your precious formulas, Excel will pop up a warning and block any changes. This simple step ensures your template stays intact and works perfectly, no matter who's using it.
Creating Reusable Weekly and Monthly Templates
The real magic of building a timesheet in Excel is making it reusable. Nobody wants to reinvent the wheel every single pay period. The goal is to create one master version—a template—that you can fire up again and again without any fuss.
This simple step saves a huge amount of administrative time and keeps your time records consistent. Instead of duplicating an old file and painstakingly deleting last week's entries, a template gives you a fresh, clean timesheet with a single click.
Structuring a Clean Weekly Timesheet
For most day-to-day tracking, a weekly timesheet is the most practical format. It gives you a detailed look at the workweek without becoming a cluttered mess. The key is to organize it logically, with clear sections for each day and a summary area that’s easy to find.
Start by setting aside a block of rows for each day, Monday through Sunday. Inside each day's block, you’ll want your core columns: Start Time, End Time, Breaks, and Total Hours.
Then, at the bottom of the sheet, create a summary section that pulls all the numbers together. This is where you'll want to see:
- Total Regular Hours: The sum of all standard hours worked.
- Total Overtime Hours: A calculation of any hours that went past the standard workweek.
- Total Weekly Hours: The grand total of every hour logged.
This clean separation makes the timesheet dead simple for employees to fill out and even easier for managers to review. The daily breakdown provides the details, while the summary gives you the critical numbers for payroll at a glance.
Expanding to a Monthly Timesheet Layout
When you need a broader overview, a monthly timesheet is incredibly useful. But don't just create a massive list of 30 or 31 days—that becomes a nightmare to scroll through.
The best way to build one is to use your weekly structure as a building block. Organize the monthly template into distinct weekly sections. You can have a "Week 1" header followed by seven daily rows, then a "Week 2" header, and so on. Each weekly block should have its own subtotal, which all roll up into a grand monthly total at the very bottom.
The most effective timesheet templates are designed for the person filling them out. Whether weekly or monthly, the layout should be intuitive, printable, and require zero guesswork.
To help you decide which format is right for you, here’s a quick comparison of the two approaches.
Template Type Comparison: Weekly vs. Monthly
| Feature | Weekly Timesheet | Monthly Timesheet |
|---|---|---|
| Best For | Detailed, day-to-day tracking and project work. | High-level overviews and salaried employees. |
| Detail Level | High. Easy to see daily patterns and specifics. | Lower. Focus is on the big picture, not daily nuance. |
| Ease of Use | Very easy and quick for employees to complete daily. | Can feel cumbersome if not broken into weekly sections. |
| Payroll Cycle | Ideal for weekly or bi-weekly payroll processing. | Better suited for monthly or semi-monthly payroll. |
| Review Process | Quick for managers to approve on a weekly basis. | Requires a more comprehensive review at month-end. |
Ultimately, the choice depends on your payroll frequency and how granular you need your time data to be. Many businesses actually keep both on hand.
Preparing Your Template for Printing
Even in our digital world, you’ll eventually need a physical copy of a timesheet. A poorly formatted printout just looks unprofessional and can be a headache to read. Thankfully, Excel gives you total control over how it looks on paper.
Head over to the Page Layout tab to dial in your settings:
- Set Print Area: First, highlight only the cells that make up your timesheet. Click Print Area > Set Print Area. This tells Excel to ignore any of your scratch notes or extra calculations off to the side.
- Add Headers & Footers: Look for the small arrow in the corner of the Page Setup group. In the Header/Footer tab, you can add professional touches like the company name, employee name, or the pay period.
- Adjust Scaling: In that same dialog box, go to the Page tab and use the "Fit to" option. This forces your timesheet to fit neatly onto a single page and prevents awkward page breaks.
Saving as a Reusable Excel Template
This is the final, game-changing step. Instead of saving your file as a standard Excel Workbook (.xlsx), you need to save it as an Excel Template (.xltx).
Just go to File > Save As, and from the "Save as type" dropdown menu, choose Excel Template (.xltx). Excel will automatically jump you to your Custom Office Templates folder. Give it a clear name like "Company Weekly Timesheet" and save.
From now on, when you go to File > New, your custom template will be right there waiting for you. Clicking it generates a brand-new, untitled copy of your timesheet, leaving your original template perfectly clean and ready for the next person.
The sheer availability of free templates is a big reason Excel remains a global favorite for time management. Many sites offer free downloads with built-in formulas, which is a lifesaver for freelancers and small businesses. If you want to check out some different layouts, you can find a range of customizable timesheet formats online.
Using Timesheet Data for Payroll and Insights
Your completed timesheet is much more than a simple log of hours—it's a powerful data source that can completely streamline your payroll and offer deep insights into how your team operates. When it's set up right, that Excel sheet becomes the engine for calculating paychecks, spotting productivity trends, and ultimately, making smarter business decisions. This is where we move beyond just tracking time to actually using that information.
The most immediate and obvious use for your timesheet data is, of course, payroll. With total regular hours and overtime already calculated, you're just a quick formula away from figuring out gross pay for each employee. This is the crucial step that bridges the gap between time tracking and financial admin, turning raw hours into accurate paychecks.

Streamlining the Payroll Process
To calculate gross pay right inside your timesheet, you just need to add a couple more pieces of information: the employee's hourly pay rate and, if applicable, a separate rate for overtime.
Here's how to do it:
- Add Pay Rate Columns: Create new columns for "Hourly Rate" and "Overtime Rate." I usually place these near the summary section to keep all the financial data together.
- Calculate Gross Pay: In a new cell labeled "Gross Pay," you'll use a formula that pulls everything together. It looks something like this:
=(RegularHours * HourlyRate) + (OvertimeHours * OvertimeRate)
This simple formula instantly calculates the total pay before any taxes or deductions are taken out, which can dramatically speed up your payroll workflow. Getting this right is critical for avoiding common payroll mistakes like overpayments.
If you want a more comprehensive walkthrough of the entire process, check out our guide on how to calculate payroll for your business.
The Challenge of Historical Analysis in Excel
While Excel is fantastic for immediate payroll needs, it starts to show its limitations when you want to look at long-term trends. A common pitfall is reusing the same template over and over by just saving over last week's data. This practice effectively erases your historical records, making it impossible to analyze productivity over a quarter or resolve past work-hour disputes.
Reusing the same file for each pay period is convenient, but it means you lose your data history. Without a proper archiving system, you can't analyze productivity over months, identify patterns in overtime, or track project costs over time.
This is a huge blind spot for any business trying to improve how they operate. You're left with isolated, weekly snapshots of time data instead of a bigger picture that can reveal actionable insights.
Tips for Archiving and Building a Historical Record
To get around this, you just need a simple but consistent archiving strategy. Instead of overwriting your template, start treating each completed timesheet as a permanent record. This is how you build a real repository of data over time.
Here are a few practical tips to get started:
- Establish a Naming Convention: Save every file with a consistent, descriptive name. A format like
EmployeeName-PayPeriodEndDate.xlsx(e.g.,JohnDoe-2024-10-25.xlsx) works perfectly. - Create a Central Folder: Set up a specific folder on a shared drive for all completed timesheets. I'd recommend organizing it with subfolders by year, and then by month or employee.
- Consider a Master Summary Sheet: For more advanced analysis, you can create a separate "master" Excel workbook. Each pay period, copy and paste the key summary data—like total hours, overtime, and gross pay—from individual timesheets into this master log.
By simply archiving your timesheets, you keep the simplicity of Excel for payroll while slowly building a dataset that becomes more valuable over time. This historical record will eventually show you exactly where your team's hours are going, helping you spot inefficiencies and make better-informed decisions about staffing and project management.
Got Questions? We’ve Got Answers.
Even with the perfect template, Excel can throw a curveball now and then. Building a timesheet often unearths a few common headaches, from bizarre error messages to figuring out how to handle shifts that run past midnight.
This section is your go-to reference for those moments. We'll walk through the most frequent questions and give you quick, practical solutions to get you back on track.
How Do I Fix the #### Error in My Time Calculation Cells?
Seeing a row of hash symbols (####) pop up in your cells can look scary, but don't panic. The fix is usually incredibly simple. 9 times out of 10, this just means the column isn't wide enough to show the full number.
Just find the column header, move your cursor to the right edge until it changes, and double-click. Excel will automatically resize it to fit whatever's inside. Problem solved.
However, if that doesn't work, you've likely got a negative time value on your hands. This happens when an end time is accidentally logged as being earlier than the start time (like clocking out at 9 AM instead of 9 PM). A quick scan of your entries will usually spot the culprit.
To prevent this from ever happening again, you can build a safeguard right into your formula: =IF(EndTime>StartTime, (EndTime-StartTime)*24, 0). This tells Excel to only calculate the total if the end time is actually after the start time.
How Do I Calculate Hours for Overnight Shifts?
Ah, the classic overnight shift puzzle. If you just use a basic subtraction formula like EndTime - StartTime for a shift that crosses midnight, you'll get a negative number and an error. For example, subtracting 10:00 PM from 6:00 AM the next day just doesn't compute for Excel.
The secret weapon here is the MOD function. It's built for exactly this kind of scenario.
The formula you need is:
=MOD(EndTime - StartTime, 1) * 24
The MOD function cleverly handles the time crossing over the midnight threshold, giving you the correct total hours worked every time. This one small tweak makes your timesheet robust enough for any schedule, no manual fudging required.
An Excel timesheet can absolutely be a valid legal document. But remember, the responsibility for its accuracy rests squarely on the business. Making sure every required piece of information is there and correct is key for staying compliant.
Can I Create an Excel Timesheet on My Phone?
Yes, you definitely can! The Microsoft Excel app is available for both iOS and Android and lets you create, edit, and view spreadsheets from anywhere. It's fantastic for logging hours on the fly.
That said, while the mobile app is great for daily entries, setting up complex formulas and designing the initial template can be a bit fiddly on a small screen. My advice? Build your master template on a desktop computer first. Once it’s all set up, using it on your phone for quick data entry is a total breeze.
Is an Excel Timesheet Legally Compliant for Payroll?
An Excel timesheet is legally compliant, but only if it captures all the necessary information required by labor laws. This usually means you need to include:
- Employee's full name
- The specific pay period dates
- Start and end times for every single shift
- Total hours worked
- A clear breakdown of regular vs. overtime hours
The biggest hurdle with Excel is the potential for human error. A typo or an accidental deletion can happen easily, and there isn't a clear audit trail. Because of this, many businesses start with Excel but eventually move to automated systems that reduce errors and ensure better compliance.
Manually building and managing timesheets in Excel works, but it can be time-consuming and leaves the door open for mistakes. If you're ready for a more automated, error-proof approach, a tool like DeskCove can handle time tracking, productivity monitoring, and payroll prep seamlessly.
Check out how you can boost your team's efficiency by visiting https://deskcove.com.